Hey!

Welcome, and you can check out my posts. But, I don't write here anymore. So, if you are interested, come on over to https://sandhyavaradh.com/
Showing posts with label food. Show all posts

Friday, September 25, 2020

My First Cake


Today I tried baking a cake for the first time. It came out looking decent, though not very clean and sharp. I didn't bother to cut off or level the top portion- so that's on me. When I checked out some recipes, it seemed like: huh, not that tough, really. But, I think baking is something that definitely comes only by practice. Here's how I made the cake:

What you need:
Dry ingredients: maida/flour, powdered sugar, cocoa powder, baking soda, baking powder, Oreo biscuits
Wet ingredients: unsalted butter, milk, thick curd, cooking oil, vanilla essence

How to make:

1. Take 2 cups of maida, 1 cup of powdered sugar, 1 tsp baking soda, 1 tsp baking powder, 1/2 cup of cocoa powder- sift them together and mix well. 
2. Take unsalted butter at room temperature, 1 cup of milk, 1 cup of thick curd, 2 tsp cooking oil, 1 tsp vanilla essence- whisk all the wet ingredients well and make sure there are no lumps. 
3. Slowly add the dry ingredients in the wet ingredients and whisk them till smooth batter consistency is reached. There should be no lumps. Add pieces of Oreo biscuit and gently fold it into the batter.
4. Take the pressure cooker, add some salt to the base. Keep a stand, and pre-heat the cooker for 15 minutes on medium flame. You should not put the weight on the cooker. Do not forget to remove it.
5. Meanwhile, coat the cake tray with cooking oil, line it with butter paper. Pour the batter, and tap the tray gently to make it even.
6. Bake for 40 minutes on low flame, and let the cake cool down completely. 

Your cake is basically ready!

How I made the frosting:

1. I made chocolate ganache by melting Dairy Milk chocolate, adding cocoa powder and milk to it until it reached a creamy consistency. I used this on the top of my cake. 
2. I took some Oreos, removed the cream, and powdered the biscuits. The cream can be whisked with cooking oil and some fresh cream milk to get a nice white frosting, which I used for the side of the cake.
3. I stuck some Oreo powder to the sides. 
4. I topped the chocolate ganache with gems!

My cake has turned out looking decent, and I am actually yet to taste it! This is the first time I am ever baking anything. The cake is far from anything perfect. Baking is after all an art that is mastered over time. But, by how it looks- it's not that bad for a first try! Also, with all the Oreos, I am wondering if it is going to be a little too sweet. I'll let you know soon, stay tuned!

Friday, September 11, 2020

Paneer Burji Gravy

We had another packet of paneer after I made momos the other day. So, that called for another paneer dish. And, this time I made paneer burji gravy for dinner. This is a simple, creamy dish that can be had with rotis, and it takes only 20 minutes to make it. Here's the recipe that'll serve four people.

What you need: 1 tsp jeera, some chopped ginger, 4 medium sized tomatoes, 2 onions, 1 cup water, garam masala, cumin powder, coriander powder, turmeric, cashews, one cup thick curd, one packet of paneer, fresh coriander leaves

How to make:

1. Take a thick bottomed vessel and add some cooking oil. Let it heat up a little, then put the jeera and let it splutter. 

2. Add chopped ginger and onions, and saute for 2-3 minutes till the onions turn pinkish/transparent.

3. Cut up the tomatoes in big pieces and add them to the pan. Cook till the tomatoes start losing water and become squishy. It'll take around 3-4 minutes. Turn off the gas.

4. Take the mixer. Add the fried tomatoes, onions and ginger into it. Add 5-6 cashews to this. You can add red chillis as per taste if you want, I didn't. Grind into a smooth paste.

6. Put the paste back into the same thick bottomed vessel. Add a cup of water, and cook in low flame till the raw smell of the paste goes away for 4-5 minutes.

7. Add a pinch of turmeric, 1/2 tbsp garam masala, 1/2 tbsp coriander powder, and cumin powder as per taste. Also, add salt as required. Let the gravy cook for 5-6 minutes.

8. Grate the paneer, and add the grated paneer to the gravy and gently mix the paneer and gravy. Do not break the paneer further by being too hard or too fast while mixing. Add a little more water after checking the consistency, only if needed. Let the mixture cook for 2-3 minutes.

9. Add a cup of fresh, thick curd to the gravy, and give it a good mix. Let it cook for a minute.

10. Check salt, and add as per taste. 

11. Add finely chopped fresh coriander leaves. Switch off the gas.

The dish is done. It is creamy, not very spicy, and has a fresh taste. It is extremely simple to make. One lesson that I have constantly learnt with such dishes is that if you want to increase the quantity, always increase the number of tomatoes and onions proportionately. Do not add water in hope of increasing the quantity as it always messes up the consistency.  So, increasing the amount of tomato-onion paste is what you should be focusing on while trying to increase quantity. 

I have always like paneer burji dishes, whether dry or with gravy, because you feel like there is no dearth of paneer! The best part is you can add more to it if you want- like chillies/chilli powder to make it spicier, or garlic if you like it. You can also add crushed methi to make this dish more rich in it's texture and flavour. Whatever you add or leave out, this dish comes out nice in all versions!

So, do give it a try!

Tuesday, September 8, 2020

Paneer-Vegtable Momos (from Momowoman)

This pandemic has stopped the usual Momoman trips my friends and I used to take through the semesters, situated at a ten minute ride from the college campus. So, I decided to make paneer veg momos today, to which a friend promptly said 'Momowoman' when I sent a picture. So, all the credits of that part of the title goes to my friend!

Let me tell you how I made the momos today!

What you need for the dough: two cups of maida, oil, salt, water

1. Prepare the maida dough: take the required quantity of maida, add salt, add a spoon of oil, mix it well, and slowly knead it by adding small quantities of water every time until it becomes a dough. The dough should not be too soft or too hard. This is important because a dough that is too soft or too hard will make it difficult to seal the momos after stuffing the filling.

What you need for preparing the filling: onion, cabbage, ginger, capsicum, carrot, beans, one packet paneer

Other ingredients you can add(but I didn't today): chopped green chilli, ginger, soy sauce

2. Chop all the vegetables. You can chop ginger, capsicum, carrot, onion, and beans finely, while cabbage can be chopped wispy(like how it is inside spring rolls). Grate the paneer evenly.

3. Take a thick bottomed pan, pour a little bit of oil. You can use butter instead of oil if you prefer. 

4. Saute ginger and onions first, until they turn golden. Then put the rest of the vegetables and fry them well until all the wetness of the vegetables dry out. Let the vegetables cook well on low flame. Add paneer, and gently mix it well with the other vegetables. Let it cook for 2-3 minutes. 

5. Add salt and pepper powder as per taste. Mix them all well, and let it cook in simmer for 5 minutes. 

Your dough and filling is now ready. Time to make momos!

6. Take a really small ball of dough. Ideally it is the amount of dough you take to make a poori. Dust the ball of dough in maida, and flatten it to the thin sheet. Make it as thin as you can. The thinner they are, the better the momos!

7. take 1-2 spoons of the filling and heap it in the centre of the flattened dough. Start making frills in the edges and close the filling by bringing the frills to the centre. This is for a round momo, you can check out other shapes that can be given to momos, if you prefer otherwise.

8. Repeat the steps until you are done with all the dough and filling. 

Time to steam the momos!

9. Take steaming deck/steaming plates. I used our idli plates today because they are the perfect steaming decks for this that we already have at home. Crease the plate well with oil. This is very important. Otherwise, the momos will stick to the plate after they are done, and it would be difficult to remove them without tearing the momo.

10. Arrange all the momos on the steaming deck. Take your pressure cooker, and fill the base with water. Take a bowl, fill it up with water and place it in the cooker. On top of this arrangement, place your steaming deck. Close the cooker, and steam for 20 minutes. 

11. After 20 minutes, switch of the gas and wait fro 5 minutes before you open and serve hot!

Time to eat!

The momos today came so well! The shape was slightly bigger and flatter than the ones that we get in the restaurant. But, the taste came out very well. We had it with spicy tomato pickle! It is really simple, and the process may seem elaborate, but I think it is just a matter of getting used to it. It makes for a simple and satisfying dish!

Remember that doing all the small steps like making the dough in the right consistency, creasing the steaming plates, flattening as thin as possible, and other such small tips truly change how the momos might turn out. Do try it out and let me know how it comes!

Thursday, August 13, 2020

Paneer Paratha

An alternate picture- because I didn't
really hit it up with the toasty smell
of parathas. At least, we can smell
the weekend!
I tried making Paneer Parathas today, because its recipe seemed way too simple to not try. However, the result was a little different from what I had expected. Let me tell you how I made it!

What you need: atta, oil, paneer, onion, ginger, garam masala, cumin powder, chillies (if you prefer), coriander leaves, salt.

1. Prepare chapati dough (take the required quantity of atta, add salt, add a spoon of oil, mix it well, and slowly knead it by adding small quantities of water every time until it becomes a dough)
2. Grate paneer; finely chop onions, ginger, and coriander leaves. Put them all in a big bowl. Add garam masala, salt and cumin powder to taste. You can add finely chopped green chillies to this if you prefer. Toss them all well so that the masala and salt coat well.
3. Divide the stuffing and the dough into corresponding equal amounts. 
4. Roll out the dough, then keep the stuffing in the centre and fold the sides to cover the stuffing. 
5. Flatten out the dough again as much as you can- to the point that the stuffing doesn't come out. 
6. Cook them well on the tawa. Add generous amounts of ghee to enhance taste.

I did all of these steps, and it was great while doing it- seemed right. But I think the amount of stuffing that we prepared versus how it tasted was kind of misleading. We used 300g of paneer and one big onion primarily for the filling, and it definitely looked like it was more than enough for 4 people, and in fact it looked like there was a lot more than we needed. But, in the end result, I had only one feeling while eating it: where did all the filling go?! Somehow the filling wasn't at all enough to feel the taste well, I thought. 

Factoring in today's experience, the amount of paneer that seems to be required takes me by surprise. Probably, we're better off doing a paneer dish to pair with rotis, rather than making a paneer paratha. Anyway, doing it was still fun, and it looked really nice while doing it. My dad was just telling me today: appearances are deceptive! Also, I don't have a picture to show you. But, you have another picture up- a happy reminder!

But I am sure, that with the right quantity (which seem to be a lot) of stuffing, the dish would have been very, very tasty. So, if you wanna try- you know what to look out for! 

Thursday, July 30, 2020

Steamed Chocolate Cake

I tried my hand at steamed chocolate cake today, and it came out looking really good! This steamed cake is essentially just bourbons and milk, and I have topped it and created a dressing according to my own choice and preferences. Here's the simple recipe! The amounts mentioned here give a dessert for four people. 

What you need: Two twenty-rupees Bourbon packets, milk at room temperature,  almonds, any biscuit of your choice.

How to make:

1. Take the bourbons, and separate the cream from the biscuit part for all the biscuits.

2. Grind the biscuits to a fine powder.

3. Slowly, add milk to the Bourbon powder, and whisk it continuously till it reaches the consistency of a flowing batter. 

4. Take the cooker, or any thick bottomed vessel, and add some water in the base of the vessel. Keep a stand, or a cup inside the vessel on top of the water. Turn on your gas, and pre heat the vessel for a couple of minutes till it starts steaming. 

5. Take an aluminium tray or a cake tin, and grease the insides of the tray with cooking oil. Make sure to grease it generously so that there is no trouble later while removing the cake. Now, add half the quantity of the cake batter into the greased tray. Tap the tray firmly to spread the batter into an even thickness.

6. Keep the tray on top of the cup inside the steaming vessel. Cover the top of the steaming vessel with a cloth, and then put a lid over it. Make sure that the cloth is not flowing down to the gas as it can catch fire. The purpose of the cloth is to absorb the water while steaming, so that the cake doesn't come out soggy. Steam it for around 5-10 minutes. 

7. Meanwhile, take a few almonds and crush them. You can also take a biscuit of your choice and crumble it. I used a Gooday choco chip cookie. This step is optional, and only for additional taste. 

8. Take a little part of the bourbon cream and smash them together. When they are smashed up, add a few drops of milk and whisk them fast to get a creamy chocolate syrup-like texture. Keep it aside. 

9.  After 5-10 minutes of steaming, open the lid and check. When it has been steamed, arrange the rest of the cream, that wasn't used to make the syrup-like liquid, on top of the steamed batter. You can also sprinkle part of the almond-cookie crushed mixture along with the cream. 

10.  Pour the rest half of the cake batter on top of this cream arrangement and spread it equally. Sprinkle some more almond-cookie crushed mixture on top of this final layer of batter. Follow step 6 and steam again for 10-15 minutes. You can open and check after steaming it for 15 minutes. 

11.  Insert a toothpick, or the edge of your knife, to check if it has steamed completely. The final cake will not stick to the toothpick when inserted. This means, that the cake is done. Let it cool down. 

12. After the cake completely cools down, take it out carefully and transfer it to a plate. Add the syrup-like chocolate sauce that you made using the bourbon cream and spread it out nicely on top of the cake. Sprinkle all the rest of the crushed almonds and cookies. I had a KitKat at home, so I just put it on top for a better look and tastier cake! Give it a couple of minutes for it all to set. 

The cake is ready!

It was tasty, and very, very chocolaty. The top dressing was sweet, and the bottom steamed cake made of biscuits balanced the sweetness. The cream that we put in between the two batter layers made sure there's a little gooey cream between the steamed layers! The almonds and the crushed cookies add very nicely to both the aesthetics and the taste! 

One line of warning: this is a steamed cake, not a baked one. So, it will not be fluffy and spongy, don't expect what we usually have in mind as a 'cake'. What it really feels like is a sweet, chocolaty dessert. 

It came out well! Do check it out!

Tuesday, July 28, 2020

What Is It About The Rains And Bajjis?

What is it about the rains that makes us crave for those bajjis and pakodas? Even half an hour into a constant, incessant pitter-patter, our thoughts abandon all productive activities and seek comfort in the dream of bajjis, fried crisp and eaten when it's still hot from the frying pan. As the temperature drops thanks to the soothing rains, our bodies crave for the hot and spicy fried fritters. There is an undeniable connect, to all Indians in their own ways, when it comes to a rainy day and bajjis/pakodas. In truth, the thought of bajjis is hardly comforting. It only paves way for even the laziest human alive to get to the kitchen and fulfill the cravings on the rainy day. 

I happen to be a person who'd most likely fantasize about chocolates than bajjis. That is only mostly. However, with the mellow sound of the constant rain today, my mind wandered to the comforting thought of hot, crisp bajjis without the slightest trace of shame while struggling with the not-at-all-perfect bicycle crunches during my workout session. 

What is it about the rains? Why does it make us crave for these crisp fritters? What is it about the rains that makes us head to the kitchen, light the stove, and prepare for the fritters, a source of instant gratification? Why do the crispy bajjis give us so much comfort and happiness as the rain pours happily outside? 

Is it one of those things that no one knows how it started, and yet it continued for years together naturally influencing us in its ways? Do we get these bajji/pakoda thoughts because that is what we have grown up seeing? What makes these bajjis so gratifying on a rainy day? 

If you are expecting answers, I don't have them. All I have is a bemused thought, and a happy smile after snacking on these comfort fritters. The satisfaction it brings on the seemingly dull, rainy day is something that we all know. But, what do you think: what is it about these rains and bajjis?

Wednesday, June 17, 2020

Dal Bati: A Modest Attempt


I first saw this semi-brown hard bread served with dal in my college. I neither knew what it was, nor knew how to eat it. And so, the first several times that I found this in the mess, I just skipped it because I couldn't understand at all how we were supposed to eat it (after a few weird attempts of trying to bite it or just dip it in dal and eat it). A friend saw me struggling once, and actually taught me how it is eaten. And, from then one, this has been one of the most satisfying, tasty dishes I have ever had. 

Dal Bati is a delicious Rajasthani dish, most typical in the arid areas of Rajasthan. In fact, it is the dish that the Rajasthani cuisine is most famous for. The popular combination to eat this is dal-bati-churma. The bati is the hard bread that is crushed while eating and is mixed with the tasty and spicy dal, while also accompanied by the semi-sweet churma. I absolutely love this wholesome combination that I got introduced to during my semesters. With the college shut down for a couple of months now, a conversation with a friend about dal bati made me try it out today!

Traditionally, batis are made in the fire and ashes of wood and cow dung- which gives it the authentic smoky flavour. However, in other places and at home, it is usually made in a grilled oven or tandoor. The hard knead dough is made into even-sized smooth, round-ish balls of dough which are then placed in the oven till they are baked inside out! But today, I've tried to make them without an oven, as I don't have one at home, and the recipe for making batis without an oven can be found here! I am not discussing the process of how it is made, so those interested can look up on page that I have linked. 

Considering that doing it on a stove was basically a substitute for oven, which in itself was a substitute for the traditional cow dung fire, I was skeptical as to how it would turn out. But, the pictures speak for themselves! Even if may not be as great as the authentic ones, for a first time it was as good as the my college benchmark. I feel really happy that it turned out well!

While preparing, kneading the dough thoroughly is very important. Simply put: better the keading, better the batis. The secret to batis that taste and smell absolutely delicious seems to be the ajwain/omam (carom seeds). They made them smell wonderful and made them feel like how batis should be. Heavily doused in hot, molten ghee, and with a tasty dal to eat it with, batis are sure to steal your heart! 

I had fun preparing it, and felt really happy eating it! If you are skeptical about trying without an oven, don't be- it turns out just fine!

Monday, June 15, 2020

Fancy Places

Enter a restaurant, and you find a seat-
a happy corner, candlelight retreat.
A bowing waiter hands over a sheet,
of numerous cuisines of dishes and treat.
One hasty glance and confusion you meet-
as your eyes skim the letters, styled in Greek,
of dishes unknown- neither heard, nor seen.
And lo, the waiter is back- with a smile so keen
to take your order from the menu umpteen.
Another skim, hasty and incomplete,
you search what to have, your mind in a reel.
Page after page you take an off-handed peek,
as you look for something familiar to eat.
And finally you say Gnocchi- your voice all meek,
in a demure of under-confidence, making it weak.
Sure ma'am, says the waiter, his smile ever sweet,
the way he was trained to meet and greet,
as he retires in grace with the order sheet.
Why fancy this place? - you think of a need
that makes you go to restaurants well heeled,
when you have your kitchen- hot food, in peace.
Is it the pride on the fancy prestige?
You tell yourself: don't bother, please!

Tuesday, June 2, 2020

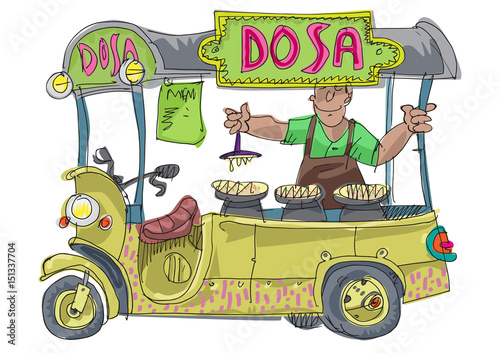
Why Do We Splash Some Water On The DosaKal?

Image from Adobe Stock
Dosai (or more popularly dosa as you'd say it if you were talking in English), is a wonderful dish. I haven't met a single person who hates dosas. There are so many varieties and variations that one can do with a dosa. It's one of those dishes that you'd never be tired of having daily. 

I can make decent dosas (quite well, actually). I have earned the badge of being consistently good at it, thanks to the critics at home- brother, mom and dad. My grandmother is a huge inspiration for me. She is the ultimate dosa master in our family, and she makes such wonderful dosas. I always aim to be as good as her, and that is why I think I have the interest and the motivation to try and make every dosa well. 

So, how do you make a dosa? You take a scoop of batter and pour it in the centre of the hot tava on the stove, and then quickly work your way in circles from the centre to the outer edge, spreading the batter to a thin, round looking sheet of batter. You put some oil on the edges, and then when the base is cooked, you turn the dosa over to the other side. That's it. Seems easy? Not that easy, though it will come to you easily if you have interest. 

Before making the next dosa, we usually sprinkle water on the tava(called DosaKal). I never understood this part alone. Why do we splash water on the DosaKal? When I asked my dad he gleefully pointed at the noise that the water makes on sprinkling on the tava, the famous whoosh that you hear when people make dosas. But is that the real reason? I did some googling to discover that people do it so that the tava doesn't get overheated. Now, this makes absolute sense to me. 

One of the most important things to successfully make dosas is to have the DosaKal in the right temperature range. It can't get too hot, and it can't lose too much heat- everything about the making the dosa is about cleverly managing the DosaKal! I felt really happy to understand why I was doing what I was doing. It makes so much more sense now. 

Everything that we do as a part of a process does have a reason. It is up to us to find out the reason before we conclude anything about it. The reason may be relevant or not in today's set up, but it is not without reason that something is/was followed. All it takes is a little interest to find out why!

Tuesday, May 5, 2020

Traversing (Personally Unknown) Territories

Moot got over? Coming for that seven-cheesy pizza (large, with that 1+1 offer).
Mid-semester happening? Need to cheer up, shall we have fries and cold coffee? And hey, repeat that order.
Mid-semester got over? Let's get that scrumptious veg lasange, mon ami. Need a break.
Mid-semester results came in today? Good? Damn, let's celebrate. Not that good? Come on, time to cheer up! All with some mouth watering mysore masal dosas.
Weekend? Let's just get out of the campus. 
Weekday? Long day, can we at least have something nice to eat?
Birthday? Hey, wait up, you got to take us to the most expensive place that we'll choose and your dad, of course, will pay the bill. 

In college, every little thing is an excuse to go out and eat (my semester budgets stand testament to that). College gave me an opportunity to explore food like I have never done until my schooldays, and fair enough because that is primarily what college days are for- eating. Dessert to me until schooldays was vanilla ice cream, and falooda. But after I got to college, things were in for a fancier outlook. They wanted cheesecakes, caramel puddings, and freak-shakes. I learnt what a waffle, a sizzler, and a momo is after I got to college, and I was genuinely surprised that people were surprised about me not knowing. Why would I, haha? We used to eat gulab jamun with ice-cream after a meal, usually.

Finding friends who also didn't know much was the greatest fun. It was great going to restaurants where I didn't understand what the dishes in the menu card were. Google really is your best friend. Okay google, what the hell is a gnocchi?

Five years of college- that seemed way too long when I was wrapping up class 12. That's like the time I took to go from class V to X. Crazy. But time ran. I am in my third year of law school, and I can't believe three years of college is already over. COVID-19 has further pushed us to cut back on the time left. Also missing aloo cheese parathas with an extremely generous amount of butter smeared on it from my college night mess . Every day is an excuse for it, we didn't even need to look for an occasion! 

Let's stay in, stay safe, and pray we get over with this terrible spell. I hope I get to go back to college soon, and I also hope I get to have as much fun in the rest of the two years! 

Saturday, March 14, 2020

Beat The Heat: How To Stay Hydrated

To stay hydrated is important all around the year, and all through the day. Here are some things you can do to ensure that. 

1. Always carry a water bottle wherever you go. Make sure you have water filled in the bottle. 
2. Eat fruits, especially juicy, watery ones. Have a lot of cucumber/tomatoes/watermelon, and the likes.
3. Drink fruit juice. 
4. Have lemonades- you get your share of boost in immunity, you stay hydrated and it is very tasty.
5. Have buttermilk(chaas/mor), if you like it. It's tasty, easier to have a lot, and basically a lot, lot, lot of water. 

Also, have other items that help maintain such hydration, such as radish, strawberries, papaya, spinach, lettuce, curd, and others. Don't forget the magic of tender coconuts! Even having soups with your meals can make it tasty, and also add water content in your body. Avoid foods that have too much salt or sugar in them. A little bit of both helps, but an excess just makes you more thirsty and feel a little dehydrated.  

The key is to have a conscious, continuous intake of water and water-based foods. Drink a lot of water before you go to bed, so that you don't wake up feeling dehydrated in the morning- 7 or 8 hours without water is a lot (not to mention some of us sleep way more than that)!

This summer, beat the heat, and stay hydrated!

Thursday, February 27, 2020

What To Eat: Dealing With Midnight Hunger Pangs

If you're a student in a University, then staying up till 12 or 1 AM is normal. And, if you do stay up till that late at night, feeling that hunger pang tug at you before you go to bed is also normal. What we usually do is go out and eat a second dinner literally in the middle of the night (here, in my college we have a night mess that serves damn nice hot, buttery parathas), or you'd probably just order your food on Swiggy or the likes. 

Uh, but, University students stay up late every single day almost. Yeah, now, so the paratha slowly becomes a luxury because it'll start to make a dent in your pocketses(oh, yeah, preciousss!). But, let's assume you are rich and have no dearth of money. Then eating out every night when you are hungry is going to make you get a cute little tummy that will probably grow out to look not-so-cute-anymore. 

That calls for the need of healthy, filling, tasty snacks- tough combo, really, next to impossible! But, here are three items you can try. I have always found these fulfilling and tasty.

      1. Bananas! 
Tasty? Absolutely. Healthy? Without a doubt. Affordable? They're the best.

Here's some mildly-researched health facts:
Other than being rich in vitamin B6, bananas are a good source of vitamin C, dietary fibre and manganese. A medium-sized banana will provide around 320-400 mg of potassium, which meets about 10% of your daily potassium needs.
Needless to say anything more, right?


2. Peanut Chikkies 
If you aren't allergic to peanuts, then go for this! What can beat a bar of peanut chikkies held together by sweet jaggery that melts in your mouth! Not only does it satisfy your sweet tooth, it is also very healthy. 

Now to health facts:
Peanuts are an especially good source of healthful fats, protein, and fibre. They also contain plenty of potassium, phosphorous, magnesium, and vitamins. Despite being high in calories, peanuts are nutrient-rich and low in carbohydrates. Jaggery is no less: loaded with antioxidants and minerals, they are rich in iron and act as a detox, helping cleanse the liver by flushing out nasty toxins from the body. 

3. Dates 
Phoenix dactylifera, commonly known as date or date palm, is a flowering plant species in the palm family, Arecaceae, cultivated for its edible sweet fruit. 

Haha, just eat it. It's one of the tastiest dry druits, and are extremely nutritious. They are high in fibre content and antioxidants, and promote good health. And, they are easy to eat. Nowadays, they come in many varieties and are available seedless. 

My friends eat a lot of other midnight snacks: greek yoghurt, health/yoga chocolate bars, blah blah blah. No doubt they are tasty and relatively healthy, but they are also expensive. These three snacks to munch on at midnight are not only healthy, but extremely affordable to most of us. And, I can assure that you will not get bored of eating them (unlike how you will if you munch on yoga bars, bleh).

So, next time you want to snack on something, try one of these! Do you have a favourite, healthy snack? Add to the list in the comments!

Sunday, February 23, 2020

Beat The Heat: Elaneer/Narial Pani/Coconut Water

Image from dreamstime.com
February is near its end, and so are the winters. In fact, I feel the winter has long gone. So, what does that signify? Lots, indeed! Why, summer is the ultimate season of mangoes, watermelons, ice creams, milkshakes, lemonades, sodas, juices, sarbaths, jigirthandas and all the other delicious, lip-smacking drinks and eateries that isn't allowed on a cold, wintry day. And along with so much freedom comes the terrible, unforgiving wrath of the sun down on the city! 

Ice creams and juices don’t help beyond a certain point. They give instant relief from the heat, but nothing more. For a long-lasting, healthy, natural, replenishing freshness, nothing beats tender coconuts! Yes, tender coconuts- the hard nut that comes in shades of yellow and green storing the soothingly cool, and sweet coconut water despite the ever-growing temperatures- are the panacea for the hot weather! Technically, for those who are interested, coconut water is the liquid endosperm, of the tender coconut. 

Take time out to go to the stocks of tender coconuts that would be available around every corner, and enjoy sipping the cool coconut water straight from inside the tough nut through a straw inserted in a single hole, deftly made by the sellers. For those who aren't satisfied with just "cool" coconut water, they can bring the whole tender coconut without making the hole, and store it in their refrigerator to have a cold drink. Even the laziest goose can have a sip at the doorstep, as some of the sellers bring the tender coconuts in pushcarts! A sip of the sweet water, and the weary faces turn cheerful again. Well! When you drink it you almost actually feel a cool breeze blowing, and slowly enveloping your body. 

Tender coconuts not only make you feel cool but are also very nutritious. In fact, they are the most nourishing beverage that nature has given to the people! They contain many essential proteins, minerals and vitamins that keep our body healthy, especially during summer. Tender coconuts help stop dehydration of the body. They clear the body of toxic wastes. They also bring down the rashes and heat boils that attack us so often during the summer months. So, naturally, tender coconuts are the best solution to beat the heat during the summer for young and old. 

One of the things that make me smoothly sail through the Gujarat heat and it's unforgiving Loo winds that blow through the day is the Narial Pani sold by the fruits bhaiyya who comes to our college through the week.

So, you want to stay cool this summer, with maximum benefits? Tender coconuts to the rescue!

Monday, December 16, 2019

Vatha kuzhambu

Image from ticklingpalates.com
After living two and a half years in college with a friend circle that predominantly consists of people who are not from the South, I got a fair insight into what they actually know about Tamil food. Idli, dosa, sambar, uttappam and medu vada seem to be widely popular. But, others like paruppu vada, masal vada, keerai vada, bonda seems to be in the shadow. Some people know of rasam. One day they made aviyal in college, and I was so excited. It was made nicely and a lot of my friends really enjoyed it.

Every time, I hear one of them talk about Tamil food, I feel really tempted to not only tell them how many beautiful dishes they have no clue about, but also make them taste it. However, it's very difficult to find good South Indian places around my College, and even if we do find one I'm always skeptical about making them try the pongal or rasam or adai, in the fear that they would consider that to be the standard of the dish.

My love for thayir sadham (curd rice), or generally most South Indians', is something unheard of there. How would I ever make them understand the happiness that a "thalicha thayir sadham" can give? It is an experience that needs to be had. And, my favourite side to have with curd rice is the vatha kuzhambu. 

There are many south Indian dishes like sambar and rasam. But only one dish can make a cup of curd rice disappear instantaneously. This one dish is the golden drop Vatha Kuzhambu. Vatha Kuzhambu is a broth made with thick tamarind pulp. The best way to eat it (obviously, according to me) is to take a handful of curd rice and top it up with a couple of drops. The subtle taste of seasoned curd rice topped by a drop of the spicy and tangy vatha kozhambu is so soothing and tasty that we wouldn’t mind another cup of curd rice for it.

None of the other side dishes can match the home-made Vatha Kuzhambu which tickles the taste buds and leaves you wanting for more. Vatha Kuzhambu can be used as a side-dish or can be mixed with rice and eaten. There are two reasons for it to be called the golden drop. One, it has a deep, slightly brownish colour of gold. Second, it is supremely favoured by all tamil foodies. A drop of this dish takes you to the seventh heaven.

And, there are so many more dishes I would want to make them eat- idiappam, set dosa, adai, morkozhambu, all our karis and kootus, and so on. I hope one day they get to taste it all, for it is an experience in itself!

Sunday, June 7, 2015

Ajji Sarbath


We took a quick weekend trip to Lalgudi, where my grandparents live, before the school reopens. This trip turned out to be absolutely awesome because of many features. One of them was the amazing nannari sarbath in Ajji Sarbath shop, in Lalgudi.


Ajji Sarbath is a seventy one year old shop located in 32, Ichadi Pillayar Koil Street, Lalgudi. It’s an amazing place with amazing sarbath. It also has other items like ice cream and sodas, but the specialty of the place is its sarbath.


Sarbath is a thick concoction of sugar syrup, water and citric acid. When you have a parched mouth, it soothes you down like nothing else!


For those, who have fallen in love with Ajji Sarbath, but cannot go there daily(like us), the place has a bottle of “Lalgudi Ajji Syrup” that you can buy. While preparing, one needs to follow the 1:3 ratio- one part syrup, and three parts water. For those who want chilled sarbath instantly, the 1:3 ratio goes as follows- one part syrup, two parts water, and one part ice cubes. If you can wait for the sarbath to get chilled, then prepare it using the first step, and then refrigerate it. Add lemon to make it better.

As a final note, Ajji Sarbath is one of the best I've ever had. I love it!

Saturday, April 4, 2015

Ratatouille

Movie: Ratatouille
Genre: Fantasy, Animation
Directed by: Brad Bird
Produced by: Brad Lewis
Story by: Jan Pinkava, Brad Bird and Jim Capobianco
Music by: Michael Giacchino

Remy, the rat has an indispensable taste for gourmet, anything related to food. His greatest wish is to cook, create and relish, instead of stealing, which is what the rats usually do. In the clan of rats, his father is the chief, and has laid the rules perfectly clear: none of the rats are to go too close to human company. Remy defies the rules of the clan, and takes lessons from the neighbouring house’s television on which the show of the greatest chef of Paris, Gusteau, is aired regularly. Remy learns a lot from the master chef and tries out different things, carefully so as to not wake up the owner of the house.

But one day, he takes his brother Emile with him, and explores the kitchen making Emile stand in guard. But the owner wakes up and starts shooting at the rats. The whole clan of rats get into trouble. While running for their lives, Remy goes back to the house to take a book of Gusteau’s titled “Anyone Can Cook”. But Remy loses the rest of his family and friends, while doing so. He finally reaches a dark place, unhappily. He sits sadly thinking he has lost everything. He becomes hungry, but doesn’t know what to do!

He then starts exploring, and finds that he has reached the top of Gusteau’s restaurant! He goes into the kitchen, and sees that a young boy called Linguini has been employed as the garbage boy by the current master chef and owner- Skinner. The boy, without the knowledge of anybody, spoils the soup that it boiling near him, thoroughly, by adding random ingredients.

Shocked to see this, Remy moves quickly and corrects the soup, adding a little of his own inventions. But Linguini, the garbage boy, sees the rat busy working at the soup, and is astonished. By this time, the master chef Skinner sees Linguini fiddling with the dish, and is extremely angry.  When the soup is served by mistake to the customers, they think it is fabulous, and Linguini gets the popularity!

Linguini and his little chef Remy, work out an understanding, and Remy creates many wonderful dishes through the hands of his human friend Linguini, making his dream come true.

But Skinner the old master chef is jealous at the growing popularity of Linguini. Also, he finds that Linguini is the late Gusteau’s son, which means that Linguini is the rightful owner of the restaurant of Gusteau’s! Worried that this might come out, he grows very mad, and acts peculiar! Also, he comes to know of Remy, the rat-friend chef of Linguini.

The climax is amazing! Remy is captured by Skinner, but his family saves him, without the knowledge of Skinner! Anton Ego, the restaurant critic, who doesn’t believe in Gusteau’s motto- Anyone Can Cook- finally comes to Gusteau’s because of the growing popularity. Remy manages to come back to the aid of his friend Linguini, and they serve the simplest and the most plain dish to Ego- Ratatouille! Ego is flabbergasted! He congratulates Linguini and tells him that it was the best Ratatouille dish that he has ever had in years. They tell him the truth- that a rat prepared the dish, and the whole story behind it comes out.

Gusteau’s gets closed. But, Remy, Linguini and Colette, together start another famous restaurant- La Ratatouille- that serves for both the rats and the humans!

It is a very nice movie! I loved it. Especially the scenes where Remy controls Linguini by pulling his hair, and they practice to cook that way is amazing! It is must-see movie!

Monday, March 31, 2014

Aloo Paratha

alooparatha.jpg

It was Aloo Paratha for dinner today.
Here is how I made it:

1. Prepare chappathi dough.
2. Pressure cook potatoes.
NOTE: Do not forget to put the cooker weight(pressure regulator on top).
3. Take the pressure cooked potatoes, take off the peel, and mash them well.
4. Switch on the gas stove. Place a thick bottomed vessel.
5. Pour some oil and add jeera and omam.
6. Add the mashed potato and mix well.
7. Put the required amount of salt and  a pinch of turmeric(haldi/manjal).
8. Add garam masala to the potatoes and mix well. Let it all cook well. Switch off the gas stove.

The stuffing is now ready!

9. Divide the stuffing into balls and stuff it into the chappathi.
10. Flatten it well.
11. Switch on the gas stove and place a tava.
12. Toast it well in high flame.

Aloo Parathas are ready!!! I made onion raita as side dish. It was very tasty!


Sunday, March 30, 2014

Baigan Bharta

20140330_184701-1.jpg
Hi! Today I did my favourite Baigan Bharta. It is quite simple. Here are the steps:

1. Take a baigan(eggplant).
2. Apply oil all over it.
3. Prick holes on the outer layer of the baigan.
4. Switch on the gas stove. Roast the baigan well in low flame. Switch off the gas stove.
5. Let the baigan cool down.
6. Grind masalas into a fine powder and keep the powder ready.
7. Grind chopped tomatoes, small onions, garlic, and ginger into a fine paste and keep it ready.
6. Now, peel off the outer skin of the roasted baigan.
7. Cut them into small pieces and grind them into a paste.
8. Switch on the gas stove. Place a thick bottomed vessel.
9. Pour some oil.
10. Add chopped onions and fry well.
11. Add the baigan paste to the fried onions.
12. Put a pinch of turmeric(haldi/manjal) and also the needed amount of salt. Mix.
13. Let it cook well.
14. Add the tomato, onion and garlic paste to the baigan.
15. Aso, add the ground masalas. Mix well.
16. Add a little amount of water and cook well.
17. Add karipaththa leaves.
18. Switch off the gas stove after sometime(2-3 minutes).

Baigan Bharta is ready!!! We had it with chappathis and it was very good. My mother roasted the baigan as I couldn't do it. Rest all I did with the help of her instructions.


Saturday, March 29, 2014

Sambar

sambar.jpg

Today’s dinner was dosa, and I did sambar as a side dish.

Here is the recipe:

1. Take a bowl full of water. Soak some tamarind for 5 minutes.
2. Take 1 cup of pasi paruppu(moong dal) and put it in a big bowl. Add chopped radish, carrot, potato and capsicum to the moong dal. Aso, add a pinch of turmeric(manjal/haldi).
3. Pour ample water.
NOTE: Pour water at the bottom of the cooker. Also, do not forget to put the cooker weight(pressure regulator on top).
Pressure cook with 4-5 whistles.
4. Take a thick bottomed vessel and add some oil.
5. Put mustard(kadugu) and fry.
6. Pour the tamarind water and add karipaththa leaves on the fried mustard.
7. Add sambar powder. Mix well.
8. Put the pressure cooked moong dal and vegetables in this and stir.
9. Add the needed amount of salt.
10. Let it cook well for a few minutes.

Sambar is ready!!!